Timing Belt Installation Guide
Proper installation of a timing belt ensures longevity, reduces wear, and prevents operational failures. Follow these steps for correct installation and maintenance.
1. Pre-Installation Inspection
Before installation, check the following:
✔ Verify the belt model (correct length, pitch, and width).
✔ Inspect the pulleys for any wear, damage, or misalignment.
✔ Ensure proper pulley alignment to prevent skewing or tracking issues.
✔ Clean the belt and pulleys to remove any dust, grease, or foreign particles.
2. Installation Steps
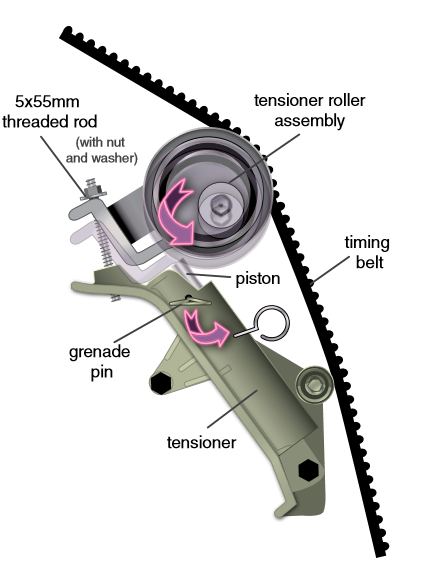
Step 1: Loosen the Tensioning Mechanism
- If a tensioner is present, release it to facilitate belt installation.
- For fixed center distance systems, adjust the shaft spacing if necessary.
Step 2: Position the Belt Properly
- Gently place the timing belt onto the pulleys, ensuring proper engagement with the teeth.
- Avoid bending, twisting, or forcing the belt into position, as this may damage the teeth.
- Ensure correct meshing between the belt and the pulley teeth to prevent misalignment.
Step 3: Adjust the Tension
- Slowly apply the appropriate tension to the belt using the tensioning mechanism.
- Too loose: The belt may slip, reducing transmission accuracy.
- Too tight: Excessive tension increases bearing load and shortens belt life.
- Recommendation: The belt should have moderate elasticity when pressed, and a tension gauge can be used for precise measurement.
Step 4: Check Alignment
- Visually inspect pulley alignment to ensure the belt runs straight.
- Use a ruler or laser alignment tool to check for parallel positioning.
- If misalignment occurs, adjust the pulley position or the tensioner angle accordingly.
Step 5: Test Run
- Manually rotate the pulleys a few times to check for any abnormal noise, jamming, or misalignment.
- Start the equipment at low speed for 5-10 minutes and observe the belt’s movement.
- Once no issues are detected, gradually increase the load to normal operating conditions.
3. Post-Installation Checks & Maintenance
After installation, perform regular inspections:
✔ Monitor belt tension (adjust as necessary after initial run-in period).
✔ Inspect pulleys for uneven wear or loosening.
✔ Check for cracks, missing teeth, or excessive wear on the belt.
✔ Keep the belt clean and free from grease, oil, or chemicals to prevent deterioration.
Conclusion
Loosen tension → Install the belt smoothly → Adjust tension → Align properly → Test run.
Proper tensioning and alignment are crucial for maximizing belt lifespan and efficiency.
Regular maintenance prevents premature failure and ensures long-term stability.
For specific installation requirements based on your machinery, feel free to ask for customized recommendations!

For more installation details, please refer to the Gates belt installation guide.
 Loading...

